Showing posts with label Jing. Show all posts

22 February 2012

Day Fifteen: QR Codes

You are starting to see them everywhere:  those odd-looking black and white squares included in everything from advertisements in magazines to posters in store windows to bananas (yes, you read that correctly).  That odd combination of pixels is actually information that can be displayed using your smartphone's browser.  The code can contain a website, your contact information, a picture, link to a YouTube video and so much more. Before we get into how QR Codes can be used in the classroom, let's take a look where QR codes come from.


Now that we understand where they came from, let's learn how to create our own.  There are a couple of options available depending on your level of technology.  The QR code scanner in the app store for the iPhone comes with an option to create your own code right on the phone (I believe there is also one for Android, but neither are really reliable).  If you are a Chrome user (and if you aren't we need to have a talk about that), there is an app in the Chrome Web Store called "The QR Code Generator" which will generate your code right in your browser.  However, if none of those options are to your liking, the favorite web site for creating codes is Kaywa.

So you have your generator and now you need something to create your code for.  QR Codes are a great way to direct users to view simple information like your class website or a video from YouTube that you want them to watch.  Go to that location and grab the url from the address bar (or in the case of YouTube videos, click the SHARE button and copy the url given there), and paste the url into the generator.  For example, one of my favorite videos to share with my students is the MHS Lip Dub.  After copying the url (ctrl+C), I can go to my Chrome app, paste in the url and generate my code as seen below.
The code can now be copied or saved as an image and put in any number of different places.  One word of advice:  the purpose of a QR Code is to direct a user to a location on the web when they are not currently sitting in front of a computer so putting one on your website is a bit of a waste.  I want to provide one other tip about QR Codes:  the longer the url, the more complicated the QR Code becomes which makes it look garbled.  You will want to use a url shortener to make it more manageable and therefore a nicer looking code.  Personal preference is for all things Google so try goo.gl, however bit.ly and tinyurl.com are also popular.  If you use the Chrome QR Code app, it already contains a "Shorten url" button so there is no need to copy from the external site.

After a short discussion at lunch, we came up with the following list of possible ways to use QR Codes in the classroom.
  1. QR code on the syllabus given on the 1st day of class to direct students to the class website.  Can also be put on the sign on the door to the classroom.
  2. QR Code scavenger hunt.  A great to connect your subject to different areas of the school is a scavenger hunt.  But, instead of simply finding a clue, the students find a QR code with it that directs them to a website to help them answer a specific question.
  3. QR Codes in books in the media center.  The code could contain a link to the author's website, an Amazon book review, or a preview of the movie based on the book.
  4. Links to YouTube videos.  This could be like the lip dub above or to podcasts that were created using JING about classroom content to be watched outside of class.  It could even go to a TED talk if you can't find what you are looking for on YouTube (is that even possible?).
So you have your QR code, now what?  Well you want to scan it with your smartphone to see if it works (always make sure it works before posting it!!).  Each company has their own free app that can be downloaded from their particular web store.  I am a Blackberry user (hey they used to be good), so QR Code Scanner Pro is the best app.  As for Android and iPhone you will need to consult someone lucky enough to have that device (just ask your students.  They know the best apps to use).  Once you open the app it will access your camera to scan the code and Voila!

The above were created in a five minute brainstorming session over lunch.  How can you see QR codes being used in your classroom?

Here are some other resources for your consideration:

17 February 2012

Day Thirteen: Podcasting/Screencasting

A lot of the tools and techniques I use in the classroom come from solving little problems that stand in the way of fluid lessons.  You have all had this situation as well:  you go through a lesson and everything seems perfect--students are actively engaged, they are asking good questions, and they are able to answer all of your questions.  The next day you put up the DO NOW and you are met with blank stares and comments like "we never learned this."  It is almost like someone erased their minds while they slept.  One day I asked the class what happened and one of my better students said, "Well, we understand when we are here, but then we go home and we don't remember how you solved the problem.  It would be great if you could videotape the example problem and post it on your website."  Then the light bulb clicked on!  If I could find a way to record what I was doing and post short (less than 5 minutes) example problems I could not only give the students a way to review the material that night after school and right before the test.  Now to figure out how to do it.

There are a lot of ways to do a podcast.  You can create a podcast that contains only audio using a program like Audacity.  These would be great in a foreign language class where the students can listen to the vocabulary and pronunciation of words and don't need a visual reference.  However, for my class I like to record video and audio because I use them as instruction so I need a slightly more sophisticated program.  A great online screencasting (program that captures images from your computer screen) is Screencast-o-matic.  Here's a short demo video on how it works (basically a screencast on how to make a screencast):
If you follow the link above to Screencast-o-matic's site, you will see they have both a free version and a Pro version.  In the free version you are limited to 15 minute recordings and require you to download the video to your computer which you could upload to a website later.  The Pro version (which of course costs money) allows for online storage on their site and basically gives you a channel to show your videos from similar to YouTube.  However, YouTube is accessible on most cell phones and even allows for downloads on iPhones which the others do not.

Now I want to showcase the product of one of sponsors, TechSmith.  No, I am not just showing this because they are our sponsor.  JING is a wonderful tool that is so unbelievably simple to use.  Here is a video demonstrating that.
What I love about JING is it downloads to your desktop so that with a quick click of a button you are recording everything that happens on your screen.  It can capture your voice from a microphone, but does not allow you to import music in the free version.  In the free version you are also limited to 5 minute videos. However, in the Pro version, a lot more resources are accessible to you including editing and uploading mp3 tracks.  TechSmith also saves all of your videos to www.screencast.com which, again, is free, but has some limitations as to how many files and what size you can store there.  But, for less than $100, you can get your own site through Screencast.com.  I actually upload my podcasts there as well as YouTube because there is an iTunes feed from Screencast.com.  I submitted the site to the iTunes Store and all of my podcasts are available for download through iTunes (yes, they're free!).  My students can now download them to their computer or mp3 player and watch my any time of the day.  I have even had some say they watched whole lessons on the bus ride into school on the day of a test.

So, as always, the question becomes "How are you going to use Podcasting/Screencasting in your classroom?"

Here are some general links to get your brain turning:
Mr. Seigel's YouTube Channel
Ideas for Podcasting in the Classroom
Integrating Podcasting into the Classroom
Podcasting in Plain English

Oh, and if you have an iPad, check out Educreations and ScreenChomp for great screencasting software.

13 February 2012

Day Nine: Online Whiteboards

You have all had this situation:  student sends you an email with a question about a HW problem/example from class and you just can't communicate your answer properly through an email.  Sometimes you can get your ideas across and then the student sends an email reply right back and now you have this long back and forth that seems to take forever through email.  Enter the web whiteboard!

One of my favorites is A Web Whiteboard.  The reason this one stands out above the others that I use is its simplicity. As you can see on the right, you get a selection of colors and pen thicknesses, and that's pretty much it.  While the ones below have a lot more bells and whistles, all of those extra features tends to slow your connection and make using an online whiteboard tedious.  The one downside to AWW is that it works best with a tablet device or Tablet PC with a stylus.  I have worked with students on this and if you are not comfortable using your mouse to draw, AWW can be frustrating.

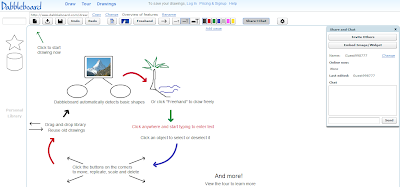
For as simple AWW is, Dabbleboard is equally complicated.  You can add pictures, diagrams, curves, arrows, shapes, typed text, as well as hand-written notes.  This is a great alternative when you don't have a stylus for drawing or a tablet device because you can type the text and then draw arrows and lines to connect ideas. Dabbleboard also allows you to sign up for an account to save your work to either return to later or email to others.  However, because of all of the options, Dabbleboard is tough to you on anything other than a computer.

Now if you are a math teacher using an online whiteboard, Scriblink is the way to go.  It has options for mathematical symbols and complete formulas, and a button to turn the whiteboard into graph paper for creating graphs out of the equations.  Like Dabbleboard, it has a lot of options in colors, pen thicknesses, and the ability to upload pictures.  However, it has one major downside and that is it is based on Java.  Java is fantastic on computers, but can't be run on iPhones and iPads.

The reason I turned to online whiteboards is the ability to collaborate with students in real time.  All three of the tools here give you a unique web address that you can share with your students to allow them to see what you are writing and have them add to the drawing.  Dabbleboard and Scriblink both give you a chat window on the side (similar to Instant Messenger) which allows students to pose questions to you while are adding to the drawing.  Because they have the ability to have an unlimited number of users, students could even answer questions posed by other students all within the chat window.

You are probably wondering why I still prefer A Web Whiteboard when the others offer so much more.  The night before my Honors Chemistry class had their midterm exam I ran an online review session using a Google+ Hangout and AWW.  With computers coming with microphones and webcams standard, there is no reason to have a chat window.  Even if they don't have a webcam, they can still ask questions through their microphone, hear my response and see the answer appear on the whiteboard.  As I was running the review, I would write reactions and formulas on the screen, and my students could make changes as I was writing if they wanted to ask questions to develop a deeper understanding.

So I have given you an easy way to use online whiteboards outside the classroom, but how about during class?  Let me pose a few scenarios to you:
  1. A classroom set of iPads is brought in and every student takes one to his/her desk.  You have a DO NOW problem posted for the students to complete.  You post the web address for the whiteboard on the screen and the students direct their browser to the location.  Randomly you call on Johnny to share his answer with the class.  Unfortunately, Johnny is a little shy so instead of getting up in front of class he just writes his response onto the screen of the iPad and not only does it appear on the screen in front, but it also appears on every iPad in the room.
  2. One of your students, Victoria, brings in her personal laptop from home.  You have shared the address for the online whiteboard with the class and Victoria is watching you complete the DO NOW on her screen as the rest of the class sees it appear at the front of the room.  She uses JING or another screencast software and records the entire problem with your voice in the background explaining the problem while she is also taking notes in her notebook. She emails it to herself or puts it in Dropbox to watch at home.  You have also been recording it and post it to the class' YouTube Channel for students who were absent.
  3. You are having the students practice their vocabulary with simple games.  Two students are playing Hangman on their iPads.  As Alex is writing out the clues on his screen, they are appearing on Evan's screen.  Evan writes a letter on his screen, and Alex puts it into the appropriate location in the words. Sounds too simple for an online whiteboard, right?  Forgot to mention that while Alex is sitting in your class in NJ, Evan is halfway across the country in a classroom in Iowa.
So, how can you see yourself using an online whiteboard in your teaching?  How do you see your students using this to collaborate with....their classmates?  ....students in other schools?  ....Scientists/experts in a specific field?

[Editor's Note: Podcasts/Screencasts will be detailed in a later post and tools such as JING will be demonstrated.]


05 February 2012

Weekend Update

First, the Technology Integration Teams would like to thank everyone who has viewed and commented on the blog posts so far.  Here are some interesting statistics that we wanted to share with you:
Number of posts: 3
Number of page views in January: 435
Number of page views in February: 1296
Number of comments: 81
Number of countries with at least 1 viewer:  11 (including Romania, Canada, France & Colombia)
That's right, we are international!!  It has been wonderful talking with colleagues about the different web tools and how they are using them in the classroom.  Keep up the great conversations!

We wanted to take a minute and bring to your attention one of our sponsors, TechSmith.
TechSmith is a great company filled with people who are passionate about helping teachers bring more technology into the classroom.  Some of their products that you may have heard of are Jing, Snagit, Camtasia Studio, and ScreenChomp.  All of these programs allow both teachers and students to create screencasts of their work to share on the Internet.  Jing and ScreenChomp are both free programs and we encourage you to try them out with your classes.  They are extremely easy to use and are designed for both the novice and advanced users.  Just a note, ScreenChomp is available only on the iPad.

In a later post, we will be introducing podcasts and screencasts and the TechSmith products will be highlighted for both their ease of use and their functionality.

Thank you to all of the people at TechSmith for their continued support for education and more importantly for helping us with giveaways for participants of this Web Challenge.